Dust from Construction: Safe Cleanup After Renovation

After a renovation in Fairhope, the crew has left, the broom is leaning against the wall, and the room looks nearly finished. Then someone walks across the floor, and a pale film seems to settle on the windowsill again. That's often the frustrating part of dust from construction: visible debris may be gone while finer residue keeps moving between surfaces and rooms.
Construction dust can collect on cabinet tops, window tracks, furniture, floors, and other places the renovation crew didn't work directly. Cleaning it well means thinking about where particles traveled and how to remove them without stirring them back into the air. Sweet Home Cleaning Service serves homeowners and renters in Fairhope, Daphne, Spanish Fort, Gulf Shores, and Orange Beach, and this guide offers practical ways to approach cleanup while recognizing when a cleaning job should pause for specialist assessment.
Table of Contents
Why Construction Dust Keeps Spreading
A renovation can appear finished before dust has stopped moving. A worker opens a door, a family member carries a box through the room, or air circulates through the home, and settled residue is disturbed again. Dust can then land on a television, a countertop, a windowsill, or the floor in an adjoining room.
The challenge isn't limited to visible piles of debris. Fine particles can settle on horizontal ledges, cling to vertical surfaces, collect in upholstery, and work into flooring edges. A room that wasn't part of the project may still need attention if people, tools, or circulating air carried dust into it.
Start with the whole area, not just the work zone
Think of cleanup as an indoor-air-management task as well as a visual one. That doesn't mean every renovation creates the same problem, or that a dusty surface tells you what a particle contains. It means a single quick wipe of the room where work happened may miss residue elsewhere.
A careful approach starts by restricting movement between the work area and finished rooms. Then it deals with larger debris, captures finer dust using suitable equipment, and cleans surfaces in an order that avoids dropping particles onto areas already completed.
For renters preparing to move in, homeowners returning to a remodeled space, or busy families trying to reopen rooms one at a time, the practical question is how far dust traveled and what materials were disturbed. The following steps help separate ordinary cleanup from situations that call for a qualified assessment.
How Construction Dust Forms and Travels
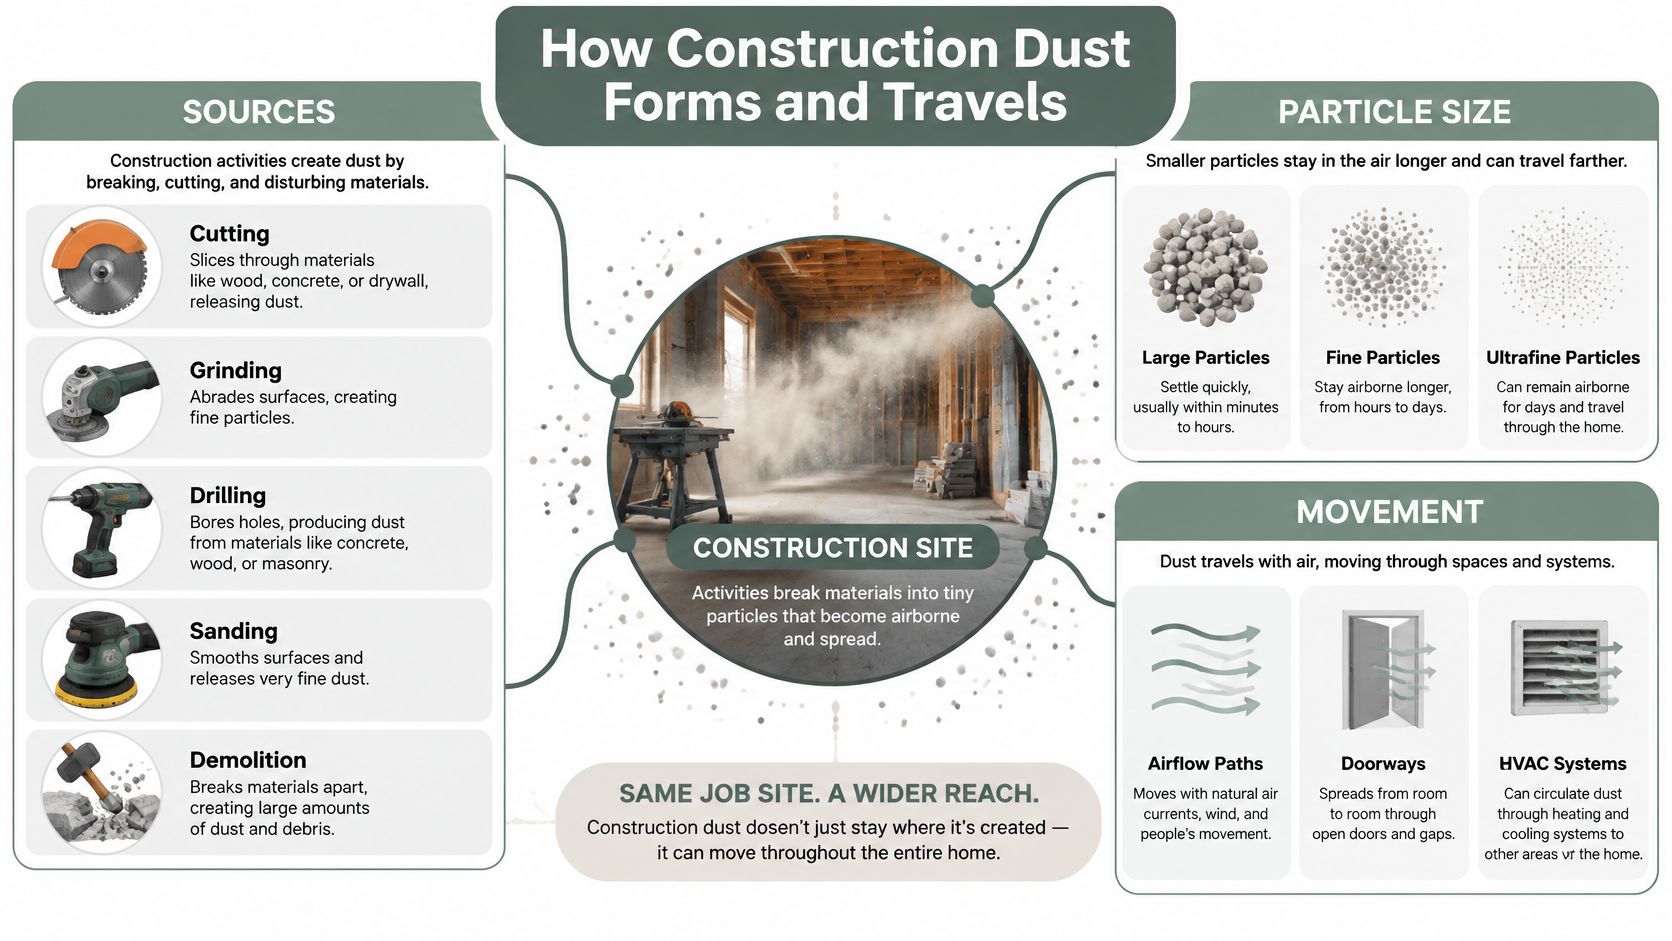
Construction dust comes from different materials and activities, so it shouldn't be treated as one uniform substance. Cutting, grinding, drilling, sanding, and demolition can all release particles. Construction dust is not a single contaminant, and disturbing concrete, mortar, brick, stone, and similar materials can generate respirable crystalline silica, as described in OSHA's construction silica guidance.
The material affects what residue looks like. Drywall sanding may leave a light powder, while woodwork can produce flakes and fine sawdust. Work on concrete, brick, or stone may create dust with a different composition. Paint, insulation, and engineered materials can also leave residue, but you can't identify its full contents by appearance alone.
Think gravel for chunks, smoke for fine residue
Coarse debris behaves a little like gravel: larger pieces are easier to see and tend to settle quickly. Fine dust is more like smoke in the way it can travel before settling. It may linger briefly in the air, move with airflow, pass through doorways, and collect far from the tool that created it.
Particle size and activity both matter. A heavy chunk on the floor is easy to notice, but smaller residue can be stirred up by walking, dry brushing, or moving furniture. That's why cleaning needs to address bulk debris and finer deposits separately, instead of relying on one visual sweep.
Air movement also influences where dust ends up. Open doors and ventilation pathways can connect a work zone to adjacent rooms. A renovation team may use controls during the work, but cleanup still needs to account for what settled afterward and how people or airflow could move it.
Recognize Fine Dust and Hidden Risks
A film on a television, cabinet top, windowsill, or floor can be a clue that residue has traveled beyond the work area. But a surface that looks clean doesn't prove that the space is free of material that needs special handling. Appearance alone can't identify a contaminant or confirm that a room is suitable for routine cleaning.
Renovation dust can include respirable crystalline silica, lead, asbestos fibers, formaldehyde, or mold. Whether any of these are present depends on the materials and work involved. Disturbing older paint, suspect building materials, concrete, or masonry calls for a different level of caution than picking up ordinary wood scraps.
Use a pause-and-assess rule
Before cleaning, consider what was disturbed, how old the home is, and whether anyone in the household could be more affected by dust exposure, including children, pregnant people, older adults, or people with asthma. Those details don't diagnose a hazard, but they can help determine whether to stop and seek professional advice.
If you're unsure what a remodeling project might involve, this guide for East Texas homeowners offers related remodeling context. It doesn't replace an assessment of materials in your own home.
Don't treat suspected lead or asbestos as ordinary dust, and don't assume that a household mask makes questionable cleanup suitable for a general cleaning crew. A cleaning service can remove routine renovation residue, but contaminant assessment and clearance are separate tasks. When suspect materials may have been disturbed, pause disturbance and contact an appropriately licensed professional to evaluate the situation.
Contain the Dust Before Cleaning
Moving furniture, tools, or cleaning equipment through the home before containing the work area can carry dust into finished rooms. Start by limiting access and protecting the routes people will use. If the project is still active, coordinate with the contractor so cleanup doesn't interfere with their work or spread residue beyond the intended area.
Set up the boundary first
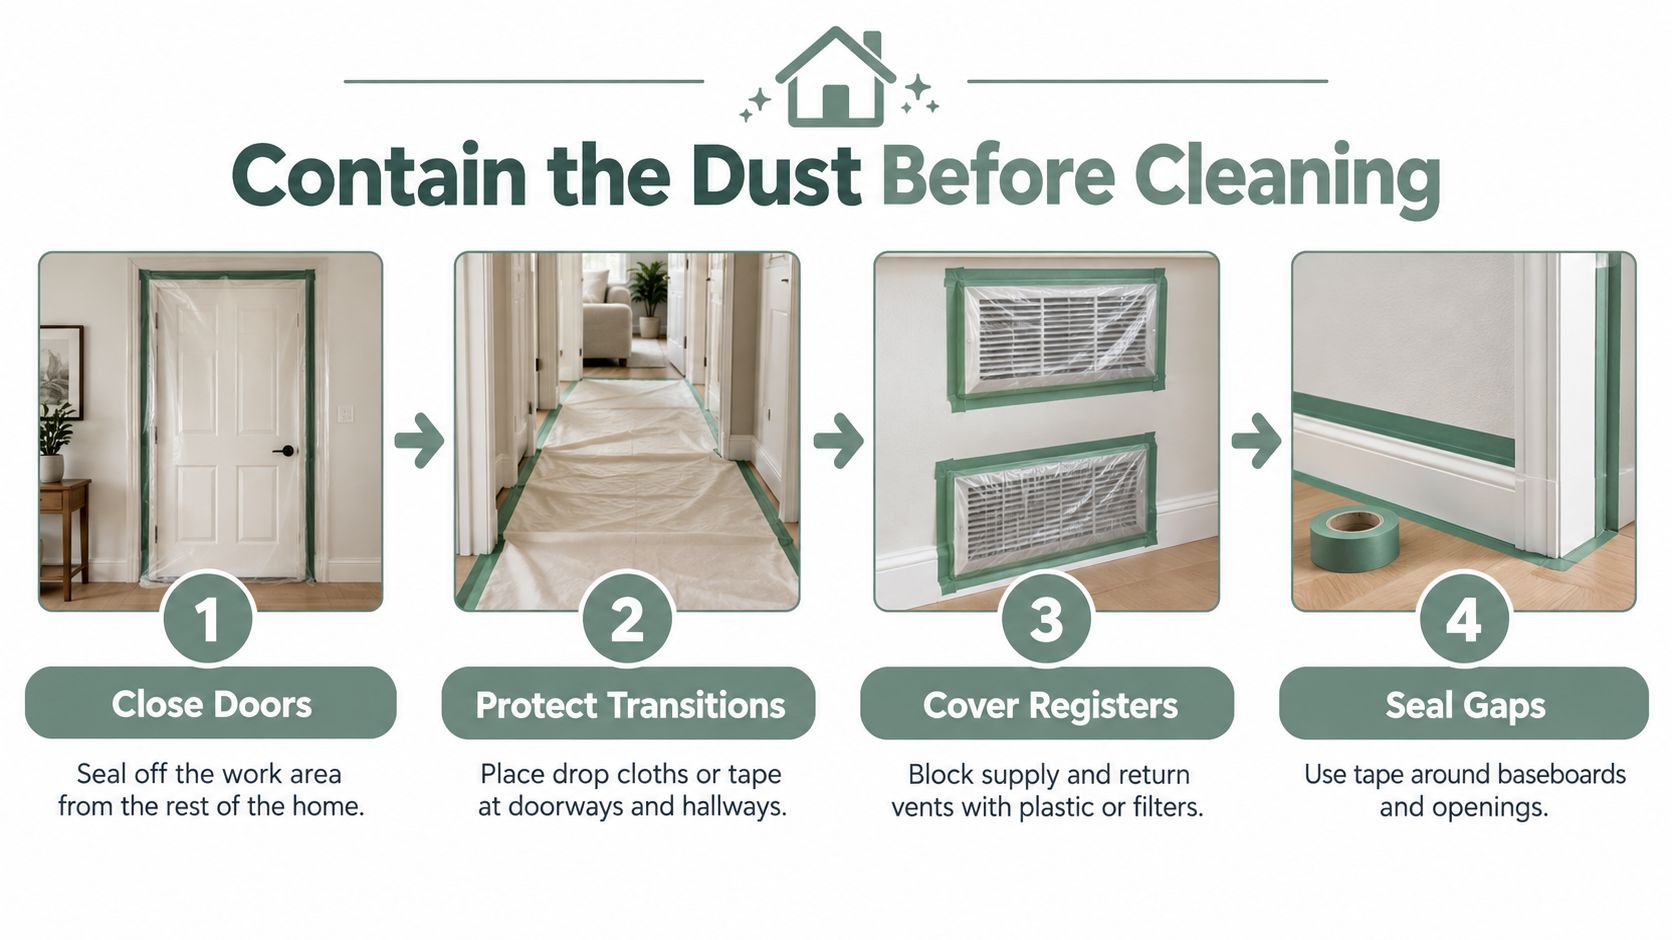
Close doors between the renovation zone and the rest of the home. Protect doorways and hallways with suitable sheeting or drop cloths, and keep occupants out of the work area until it's ready for cleanup. Remove larger debris without dragging it across finished flooring.
Check the supply and return registers in the work room. EPA recommends covering doors, openings, and registers, using exhaust ventilation, and continuing maximum ventilation during installation and for at least 72 hours afterward when activities may release pollutants. The appropriate approach depends on the work and conditions, so that period isn't a universal guarantee that a space is safe or ready to occupy. See EPA's renovation and repair guidance.
If ventilation is needed, arrange it so it doesn't push residue toward clean rooms. Avoid directing a fan across settled dust. For a sense of how a bathroom project can unfold in stages, this Melbourne bathroom renovation process guide provides context for planning around work areas and transitions.
Isolate the source, control movement, then clean.
Follow a Top-Down Cleanup Method
Once the area is contained and the work is complete, use a consistent sequence. Start by identifying the type of debris and checking whether anything looks suspicious. If you have reason to suspect hazardous materials, stop and seek assessment rather than treating them as routine household dust.
Work from high surfaces downward
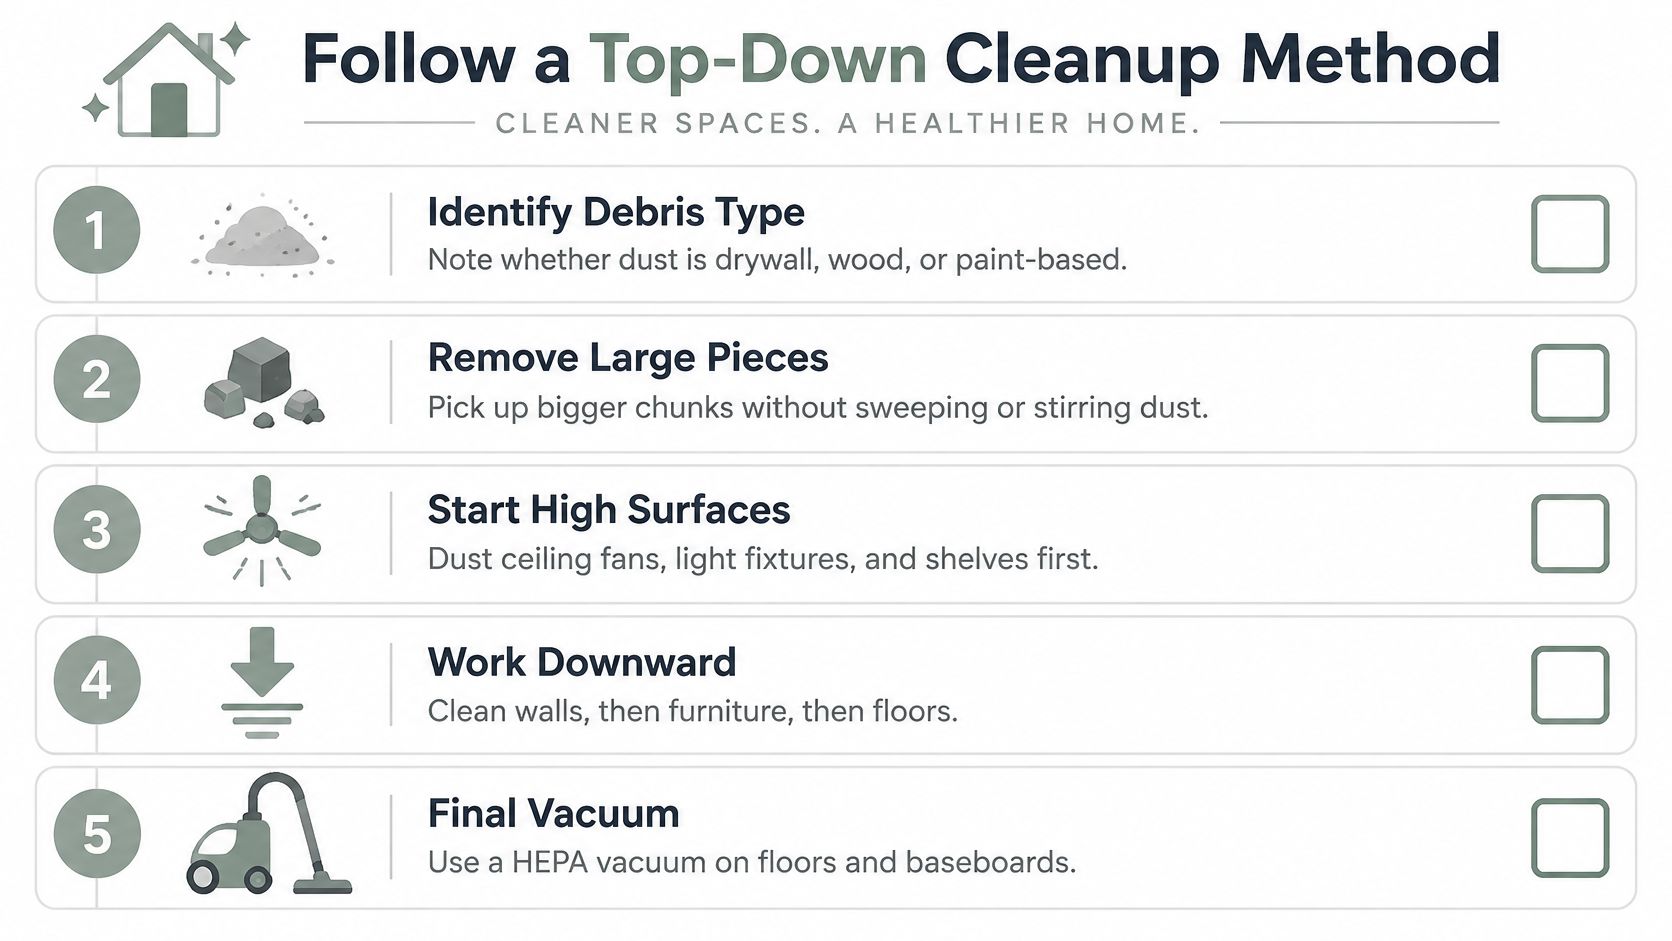
The Health and Safety Executive recommends removing larger debris before controlling finer material, and using dust-class M or H vacuums and/or wet-cleaning methods because settled dust can become airborne during movement or dry brushing. Its construction dust cleanup guidance supports a simple sequence:
- Remove large pieces carefully. Pick up loose scraps and chunks without sweeping vigorously or dragging debris across finished floors.
- Clean high surfaces first. Use suitable equipment on ledges, trim, fixtures, window frames, and other high surfaces.
- Move down the room. Damp-wipe compatible hard surfaces, including furniture and other touch points, using clean materials. Change cloths when they become loaded with residue.
- Finish the floors. Address corners, edges, and narrow spaces after the upper surfaces are clean. For carpets and rugs, use appropriate fine-particle filtration rather than an ordinary household vacuum by default.
- Check your work. Look again at surfaces and floor edges. If visible residue remains, repeat the relevant cleaning pass instead of brushing it around.
Room-by-room tracking can help a household avoid cleaning the same area twice while overlooking another. A living room cleaning guide can also help with routine room details, though post-renovation residue may require additional containment and equipment.
Choose Tools That Capture Rather Than Spread
The wrong method can make a room look cleaner while moving fine residue elsewhere. Dry sweeping can lift settled dust, compressed air can force it into the room, and an ordinary vacuum may not be designed to capture hazardous fine particles. Choose tools based on the surface and material, and check the equipment's filtration and manufacturer guidance.
EPA defines a HEPA filter as the final filtration stage of a vacuum that captures particles 0.3 microns in size with 99.97% efficiency. Its renovation-cleanup guidance recommends HEPA vacuuming carpets and rugs, then wet-mopping uncarpeted floors. It also describes two-bucket mopping, which keeps wash water separate from rinse water.
Compare the options
| Cleanup Method | Likely Result | Best Use | Key Caution |
|---|---|---|---|
| Dry sweeping | Can stir settled dust into the air | Collecting larger debris only when dust isn't being dispersed | Avoid for fine residue |
| Ordinary household vacuum | May remove visible material but may not capture fine dust as intended | Routine household dirt when no construction residue is present | Don't assume it's equivalent to construction-rated filtration |
| Compressed air | Can blow particles onto other surfaces or into adjacent spaces | Not a routine post-renovation cleaning method | Avoid using it to clear settled dust |
| Damp wiping and mopping | Binds residue for controlled removal | Suitable hard surfaces and floors | Use a surface-appropriate amount of moisture |
| HEPA or dust-class M or H vacuum | Captures finer material when properly specified for the task | Carpets, rugs, edges, and fine construction dust | Choose equipment suited to the material and work conditions |
For insight into controlling silica dust during material work, these sandstone dust hazard prevention tips add useful context. When cleaning kitchen floors, adapt ordinary floor-care practices to the residue and finish, as described in this kitchen floor cleaning guide.
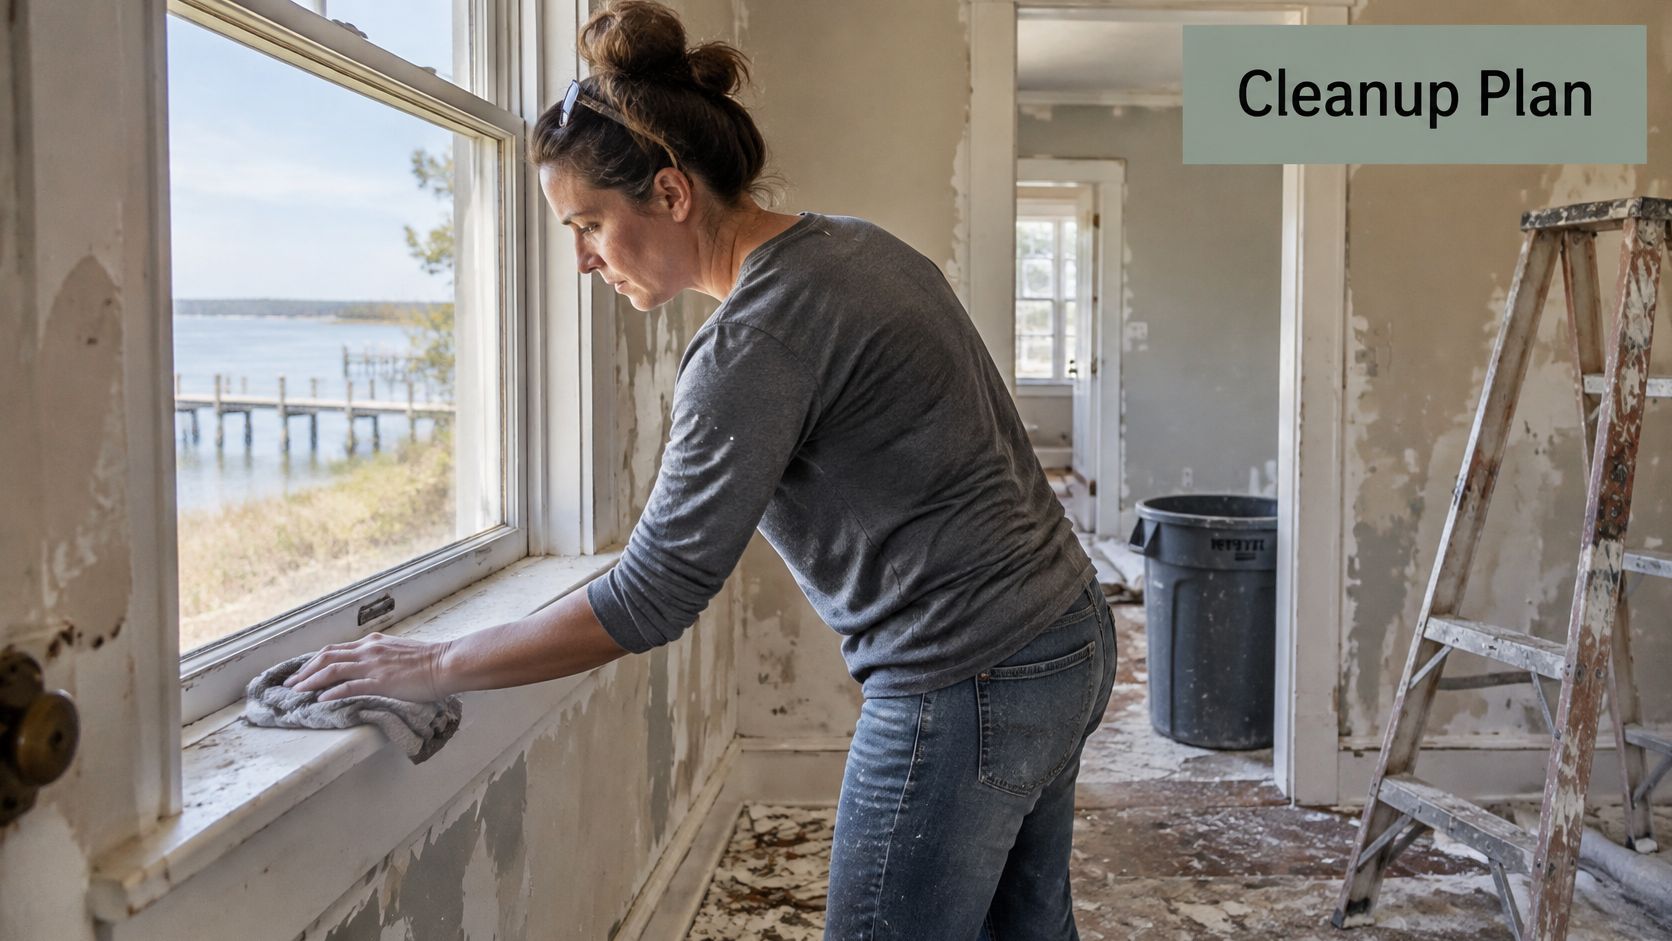
Apply the Cleanup Plan to Local Homes
A renovation in an older Eastern Shore home may involve materials that deserve careful evaluation before anyone starts scraping, sanding, or sweeping. If you're uncertain about paint or building materials, pause before disturbing them. Routine cleaning should begin only when the work and residue are appropriate for ordinary cleanup.
Busy families in Fairhope, Daphne, and Spanish Fort may find it easier to reopen the home in stages. Keep completed rooms separate from the work zone, and document each area as you clean it. Note floors, walls, fixtures, furnishings, and windowsills, not just the surface directly beside the renovation.
Account for the way the home is used
For vacation rental turnovers in Gulf Shores and Orange Beach, construction residue may overlap with beach sand tracked inside by guests. Sand is visible and coarse; renovation dust may be finer and settle on window tracks, furnishings, or surfaces beyond the work area. Check whether doors or HVAC circulation connected the renovation space to rooms intended for guests.
Gulf Coast humidity and mildew concerns make moisture management important, but they aren't a reason to mist every surface. Use damp cleaning only where appropriate for the material, and dry surfaces as needed. During hurricane season preparation or cleanup, work through dust and debris in a controlled order rather than sweeping residue through the home.
Move-in and move-out cleaning benefits from a room-by-room record, particularly when a renter, buyer, seller, or property manager needs to confirm what was addressed. Sweet Home Cleaning Service offers standard house cleaning, deep cleaning, move-in/move-out cleaning, vacation rental cleaning, and recurring maid service on weekly, biweekly, or monthly schedules. For routine upkeep after renovation cleanup is complete, a recurring plan can help busy households maintain their spaces without treating every visit like a construction cleanup.
Verify the Result and Choose Help Responsibly
Before calling a renovation area ready, check the work itself, not just the most visible surface. Ask what work took place, which materials were disturbed, whether the home's age or materials raise concerns, and whether dust reached rooms beyond the work zone. If suspect materials may have been affected, stop disturbing them and contact appropriately licensed professionals for evaluation or clearance.
OSHA's construction standard sets the silica permissible exposure limit at 50 micrograms per cubic meter over an 8-hour workday, with an action level of 25 micrograms per cubic meter. Those are worker-exposure thresholds, not cleanliness targets for an occupied home, as clarified in OSHA's construction silica standard. A household can't use those limits as a visual test or substitute them for specialist assessment.
A practical final check
- Confirm the work: Identify whether the project involved sanding, demolition, cutting, or disturbance of older paint or suspect materials.
- Check containment: Make sure the work area stayed separated from rooms already cleaned.
- Review surfaces: Look at ledges, fixtures, furnishings, floor edges, and adjacent rooms, not only the main work area.
- Choose the right help: Use routine cleaning for ordinary renovation residue, and seek licensed assessment when hazardous materials may be involved.
- Record completion: Note which rooms and surfaces were addressed before move-in, handover, or reopening.
Post-construction cleanup and a general deep clean aren't interchangeable. This guide to deep cleaning versus regular cleaning can help clarify the difference when you're planning household care after the dust question has been addressed.
Sweet Home Cleaning Service provides post-construction cleanup, standard house cleaning, deep cleaning, move-in/move-out cleaning, vacation rental cleaning, and recurring maid service for homes in Fairhope and the surrounding Eastern Shore and Gulf Coast area. If your renovation is complete and the remaining dust is suitable for routine cleaning, visit Sweet Home Cleaning Service to book or request a free quote.

Let us handle the cleaning. Enjoy your home.


Sweet Home Cleaning Service
19940 State HWY 181, Suite E Fairhope, AL 36532
Phone: (251) 586-4081
sales@sweethomecleaningservice.com